Tutorial #3 - Get started with writing and publishing in HTML5
About the tutorial
This tutorial is the first in the series that explain how to author and publish with HTML5, CSS2 and JavaScript
This tutorial is for learners at level of University Year 1
Introduction
Nowadays, the web is almost everything and almost everything is on the web. People with good knowledge and skills in authoring and publishing on the web will be more likely to have better jobs and better life. That's why one should learn how to write and publish on the web.
The World Wide Web provides all the services in a client-server mode, in which web servers host the services and clients access the services via web browsers such as Microsoft Edge, Google Chrome, Apple Safari, Opera by Opera Software, Mozilla Firefox, and others.
In general, the web provides two types of services to users. The first one is to present formatted documents for users to read, whereas the other is to provide business services to users for business transactions. Web services in the former category usually involve no business logic, although backend database and programming may still be used to dynamically generate the contents of web documents or entire web documents.
To produce good and attractive web documents, it requires
- authroing in HTML,
- styling with CSS (Cascading Style Sheets), and
- if necessary and possible, making the documents interactive with JavaScript.
What you will learn from this tutorial are the basics of how to write web documents in HTML. After completing this tutorial you will be able to write web documents that can be deployed on a web server, and presented in web browsers. The documents may be plain and no-fancy, but they can be consumable and useful to others on the web, and they can be better styled with CSS you will learn in later tutorials.
Install VS Code for Web Authoring
For all web development and programming courses and tutorials on this website VS Code will be used as IDE for content authoring and coding, so that you only need to learn how to use VS Code for your all needs in programming and web authoring. For web content authoring in HTML, styling with CSS and frontend coding in JavaScript, VS Code came with all the tools you need to do the job, although there are still other extensions providing additional convenience or different look-and-feel.
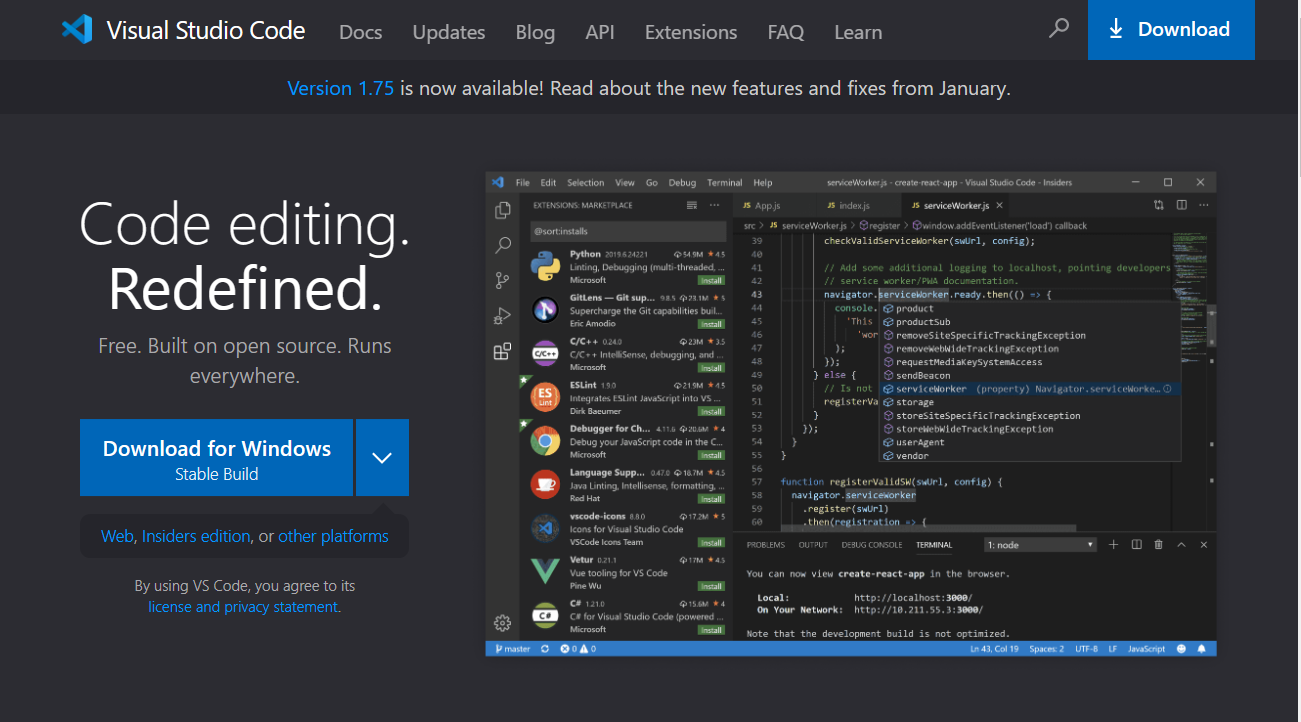
To install VS Code on your computer, first you need to download VS Code from https://code.visualstudio.com/Download for your platform. Most time, the website will identify your computer and show the version you need to download, as can be seen in the screenshot below:
!ALERT!
When downloading from the internet, you must carefully verify the source to be sure it is really the one you want, to avoid from potential phishing attacks.
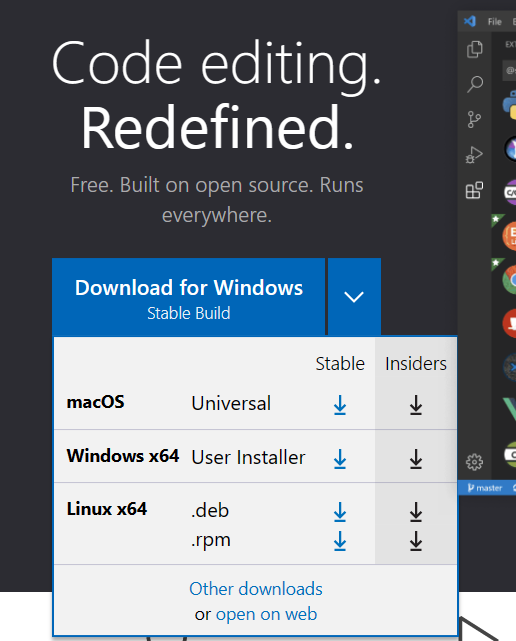
If this is the case, you can simply click the Download button to download. Otherwise, you need to click the down arrow and choose the one for your platform, as shown in the next screenshot.
Once downloaded, the installation is rather simple - just run the downloaded file and you will be guided through the process. Now you are ready to learn web authoring by working through all the examples in this tutorial.
Structure of HTML document
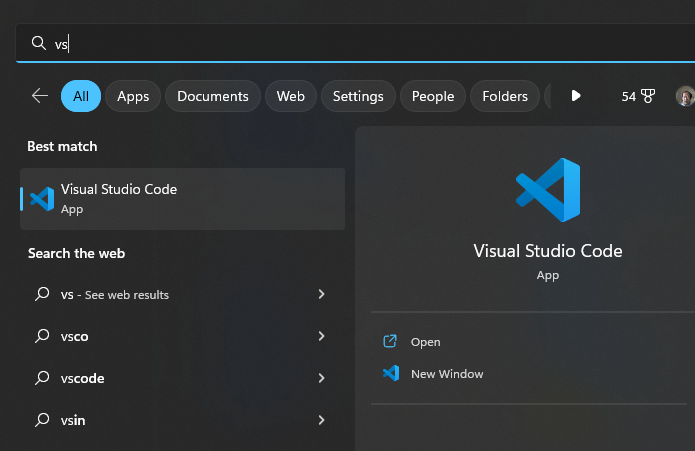
With VS Code installed, you are now ready to launch it and create a new HTML document:- Click VS Code icon on you desktop, or type VS Code in the search field, click VS Code when it is
shown up in the list:
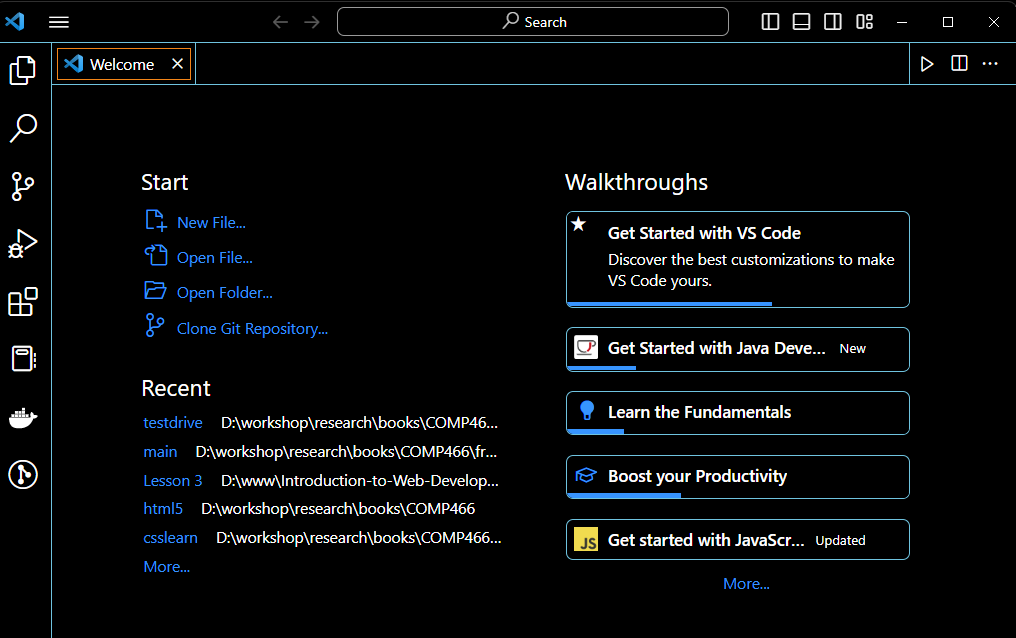
The VS Code window will open like the following:
-
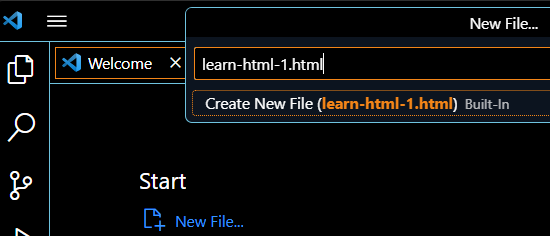
Now click New File, type a name with extension .html, such as learn-html-1.html as shown in the
following example.
-
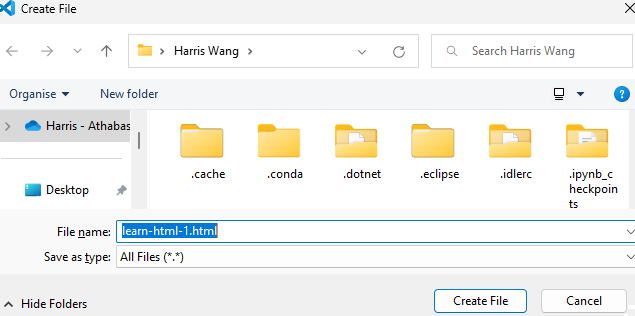
After press enter/return key, you will be asked to choose or create a folder for the new file to be
created, as shown below:
-
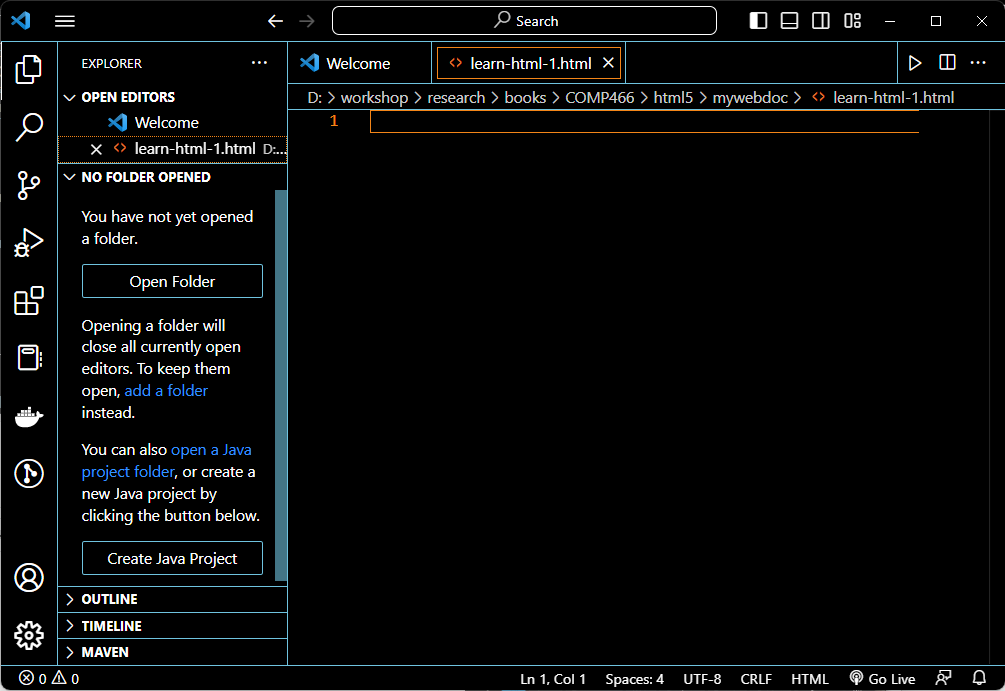
then the new file will be created within the chosen folder, and opened in VS Code as shown below:
#NOTE
You can also create a folder outside of VS Code, and then use VS Code to open the folder at the time of starting VS Code, or when VS Code asks you to choose a folder for a new file.
-
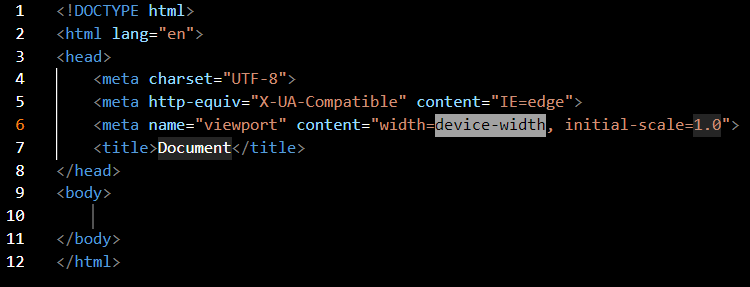
Now type html:5 at the beginning of the new empty file opened in VS Code, a html template will be
automatically created for you, as shown here:
Trick
To start authoring on a new web document in VS Code, simply type doc or html or html:5, then press Enter , VS Code will automatically generate a layout for you to fill up.
As you can see, the first line of the template is <!DOCTYPE html>, which explicitly tell that the web document is in html. This is completely necessary in the old days when there were different HTML standards were used. Today, HTML, or HTML5 more precisely, has become the only one being used. Therefore, it won't cause any problem if that statement is missed.
To generate a template without that doctype statement, simply type doc or html and then press enter. The template will look like the following.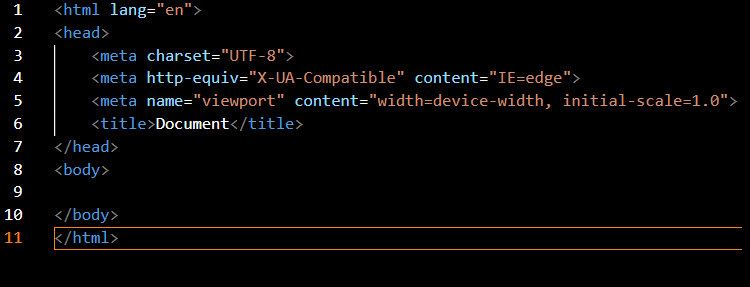
All web documents in HTML5 should have the same structure as shown above, just be sure the browsers will know what they expect from the web documents.
Now let us examine the template carefully, to know what each line is for.
Since we have already explained what <!DOCTYPE html> does, we will refer to the template on the picture right above, start from line 1.
-
The statement on line 1 is <html lang="en">, it is the opening tag of html element. Its
corresponding closing tag </html> is on line 11. Any html document can have only one html
element. Browsers will only interprete everything within the html element. Anything before the
<html lang="en"> tag or everything after the </html> will be ignored by web browsers.
In this opening tag, lang is an attribute of the tag. It is used to tell web browsers in what language the content of the web document is written. In this template, lang="en" is telling the content is in English.
We mentioned opening tag and closing tag, where opening tag is a tag name enclosed in a pair of angle brackets, such as <html>, whereas closing tag is a tag name led by a forward slash (/) and then enclosed in a par of angle brackets, such as </html>. By HTML5 standard, every opening tag must be paired with a closing tag, with only few exceptions, which will be explained in later sections.
Please note that to web browsers tag names are not case sensitive, which means that <html> and <HTML> are the same will be treated the same by web browsers. However, as a common practice within the web development community, tag names are consistently in lower case.
Good Practice
A common practice in the Web development community is to use all lower-case for tag names. -
The opening head tag on line 3 starts the head element of the web document, which is ended on line 8
with a closing head tag.
Note that each web document must have one head element. Everything inside the head element will not be rendered on the browser window and presented to the viewers, but the stuff inside the head element are still very important:
- The meta tag <meta charset="UTF-8"> on line 4 tells browser the contents in the document is encoded in UTF-8, so that the browser will know how to render the characters.
- The meta tag with http-equiv attribute on line 5 will let the server add an HTTP header to tell what browser the web document is prepared for. This info could be important in the old days when the browsers on the market were not as compatible as we have today.
- The meta tag with name="viewport" content="width=device-width, initial-scale=1.0" defines the value of viewport, which tells the width of view port the web content to be presented, as well as the initial scale of the view.
- Then came to the title element on line 7, which every web document should have. It provides a title for the document to be displayed on the browser's title bar on the top of the browser window.
- The information provided in the meta is called meta data, which is the data about the web document. Other meta data that may present include description about the document, keyword for the content. These data are important for search engines such as Google. Their web bots will crawl through the web and index the web documents based on the description and keywords provided with the meta tags.
- Other information that may and should be placed inside the head elements are external resources, such as CSS files for Cascading Style sheets, JS files for JavaScript. Both CSS styles and scripts in JavaScript can also be defined within the head element, with style tag and script tag respectively. We will get to those in later tutorials.
Basic tags
h1 Tag
h1 tag is used to create first level heading and should be rendered bigger than other level headings. A web developer may style lower level headings with larger font, but that is not a normal practice.
The following code<h1>Level one heading</h1>will be rendered as
Level one heading
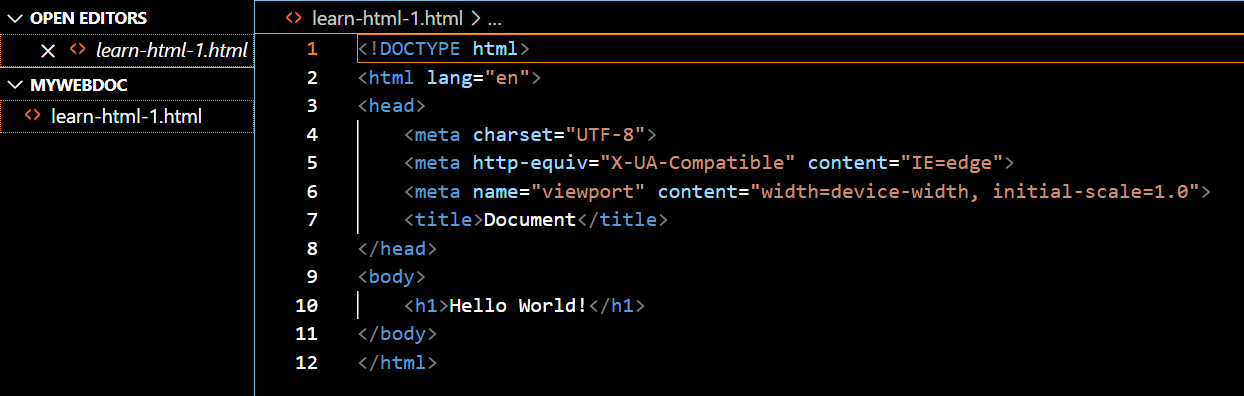
Now with this first tag you just learned, you can write your first line on the new document, right after the opening body tag:
<h1> Hello World! </h1>
You web document will look like the following in VS Code:
To view and test your page, you can simply launch the live server provided in VS Code, by clicking button at the right of status bar, as shown below:

your web page will be launched in your default web browser, as shown below:

As you can see, the live server is on local host at port 5500, and the url is http://127.0.0.1:5500/learn-html-1.html
h2 Tag
h2 is used to create a second level heading in an HTML document.The following code<h2>Level two heading</h2>
will be rendered as
Level two heading
h3 Tag
h3 is used to create a second level heading in an HTML document.The following code<h3>Level three heading</h3>
will be rendered as
Level three heading
h4 Tag
h4 is used to create a second level heading in an HTML document.The following code<h4>Level four heading</h4>
will be rendered as
Level four heading
h5 Tag
h5 is used to create a second level heading in an HTML document. The following code<h5>Level five heading</h5>
will be rendered as
Level five heading
h6 Tag
h6 is used to create a second level heading in an HTML document. The following code<h6>Level six heading</h6>
will be rendered as
Level six heading
p Tag
p tag is used to start a new paragraph. The following code
<p>
<b>p tag </b> is used to start a new paragraph.
</p>
br Tag
br tag is used to break the current line, and make the content followed start on a new line. This is useful when we want to force a line to break, or add an extra space between lines. The following code
HTML5 is great yet easy to learn, and <br><br>you will love it!
will be rendered as
HTML5 is great yet easy to learn, and
you will love it!
a Tag
a tag is used to create a link to a web resource. The following code
Promote openness in education, research,
publication, and beyond at
<a href="https://www.trustopen.org" target="_blank">
        TrustOpen
</a>
will be rendered as
Promote openness in education, research, publication, and beyond at TrustOpen
img Tag
img tag is used to place an image or picture in a web document, as shown below:

<img src="images/charlie.jpeg" alt="my lovely dog"
class="linealone">
Please note that you can use width and height attribute to specify the size of the image. For example,
the following code will make the image smaller:
<img src="/media/tutorials/3/images/charlie.jpeg" alt="my lovely dog"
    width="100px" height="88px">
When you specify both the width and height for an image, the aspect ratio may not right so that the
rendered image may not look right. To solve the problem, you can just give a specific value to either width
or height, whereas give "auto" to the other. As can be seen, the following code have produced a better
result:
<img src="/media/tutorials/3/images/charlie.jpeg" alt="my lovely dog"
    width="100px" height=auto>
video Tag
video tag is used to include video file in a web document and make it ready for user to play, as shown below:
<video width="100%" height=auto controls
controlsList="nodownload">

        <source src="/media/tutorials/3/videos/loveit.mp4" type="video/mp4">

        <p>Your browser doesn't support HTML video. </p>

</video>
if you don't want the sound, you can add muted to the video element. So, the code will be like the
following:
<video width="100%" height=auto controls
controlsList="nodownload" muted autoplay>
        <source src="/media/tutorials/3/videos/loveit.mp4" type="video/mp4">
        <p>Your browser doesn't support HTML5 video. </p>
</video>
A video file can also be embedded in a web document in a simpler way as shown below:
<video src="/media/tutorials/3/videos/loveit.mp4"
    width="100%" height=auto controls controlsList="nodownload">
</video>
iframe Tag
iframe tag is used to include another web resource into a web document. The other resource can be another html document. It is very often used to include external video and make it ready for user to play in a iframe, as shown below:
The code to embed the YouTube video is as follows:
<iframe width="560" height="315"
src="https://www.youtube-nocookie.com/embed/kUMe1FH4CHE"
    title="YouTube video player" frameborder="0"
    allow="accelerometer; autoplay; clipboard-write;
    encrypted-media; gyroscope; picture-in-picture; web-share"
    allowfullscreen>
</iframe>
It is especially useful when you want to embed YouTube video in a web document. The video tag we discussed above cannot be directly used to include YouTube video in a web document, because video tag takes actual video files such as mp4 file whereas Youtube does not expose its raw video files but the unique id of the video instead.
audio Tag
audio tag is used to include audio file in a web document and make it ready for user to play, shown below:
<audio src="/media/tutorials/3/audios/1.m4a" autoplay
    width="100%" height=auto
    controls controlsList="nodownload">
    You read this because your browser
    doesn't support audio tag.
</audio>
Summary
This tutorial has shown how to set up VS Code for web authoring, as well as the basic HTML tags. After completing this tutorial, one should be able to write and test simple web pages that may include all levels of headings, paragraphs of textual content, images, videos, and audio clips.
In the next tutorial we will cover tags that can be used for page layout and structuring.